button in Safari
How Do You Build Your Own Poker Table?


You can build your DIY poker table with just some plywood, foam, and felt. But it's not as easy as that; there's more to it. Building your own poker table encompasses a lot, so read this before you get going, as we bring you the do-it-yourself guide to building your own poker table.
There are many poker supply companies that will sell you a poker table. They come in just about every price range; from a $100 portable folding felt top that can fit onto an existing table, to a high-quality casino style private table with a wooden pedestal costing $2,500 or more.
At the same time, one might think that you could make your own poker table, and perhaps save a considerable amount in the process. Today, we bring you a step-by-step story on how to make your own poker table by experienced poker player Ken Tilden.
What Tools and Materials Do You Need to Build Your Own Poker Table?
To build your own poker table, you need several materials. For a DIY poker table, you'll need to be able to read plans, have some basic carpentry skills, and also to be able to handle upholstering.
Tools
- a skill/circular saw
- a staple gun
- a drill with Phillips-head/crosshead and socket for screws and lag bolts
- hammer
- utility knife
- scissors
Materials
- two sheets of 3/4" plywood
- carpenter's glue
- set of folding legs
- speed felt
- 1" foam
- vinyl/leather
- 1" drywall screws
- 1" lag bolts for legs
- staples
Step 1: Prepare; Build a Plan, and Decide on Your Measurements
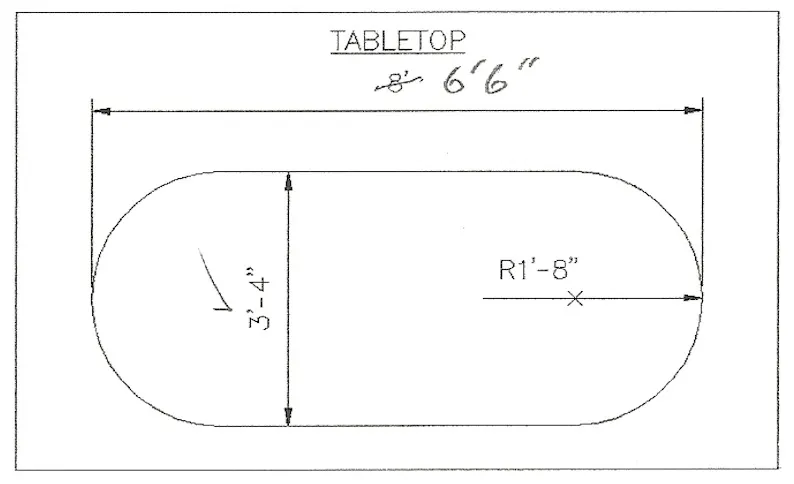
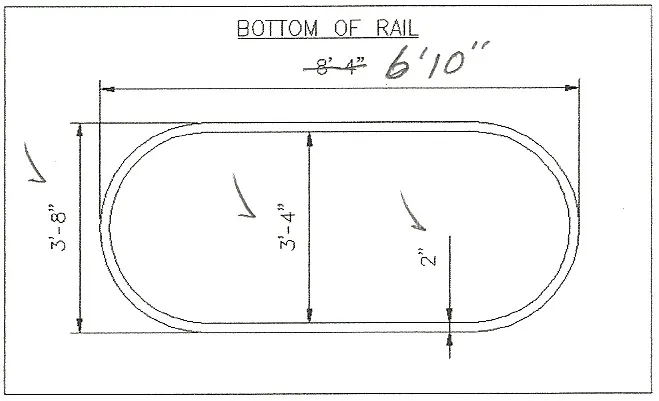
Due to the size of my room, I was unable to build a full 8' (2.43 meters) table (8'4" (2.54 m) with the overage). Hence I cut down the plan and decided to build a 6'10" table (2.08 m).
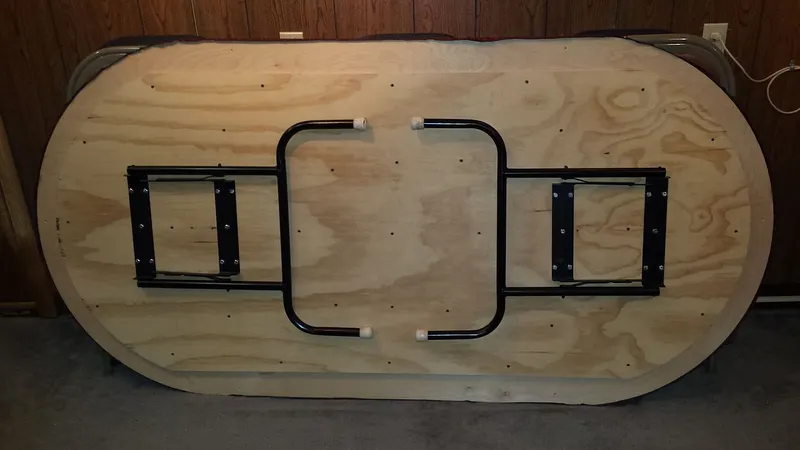
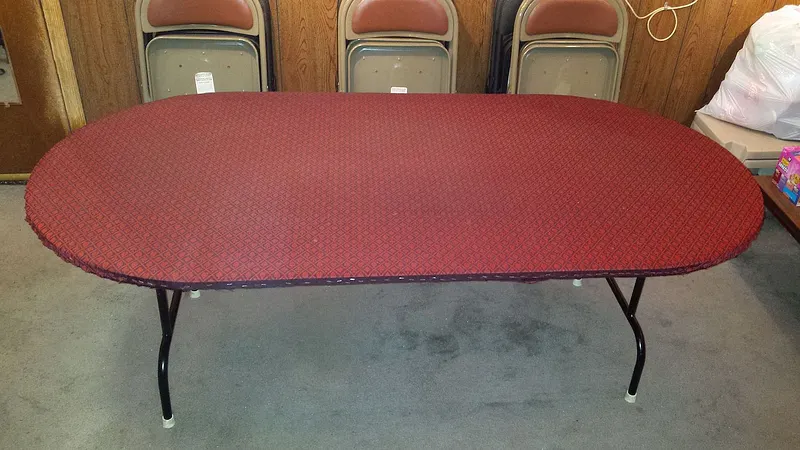
Folding legs make for easy storage.
The dimensions of the table, then, are 82" (208 cm) long by 44" (112 cm) wide with a height of 30" (76 cm). Folding legs make for easy storage.
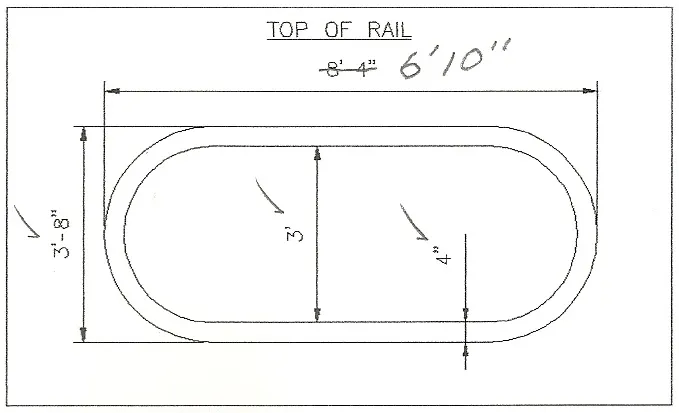
The end-to-end playing surface is 6'2", plus 8" overhang for the rail at each end (2" on table and 2" off the table), again adding up to 6'10" (208 cm).
The table width playing surface is 36" or 3'. Again adding the 8" total overhang, making the total width of the playing surface 3'8" (112 cm).
Here are a few diagrams I used to illustrate the dimensions. The first three show my changes to accommodate the shorter table.
Step 2: Construction of the Poker Table Itself
Cut the plywood to the proper size of your envisioned table (from the first piece of plywood).
Cut the top and bottom rail sections (from the second piece of plywood).
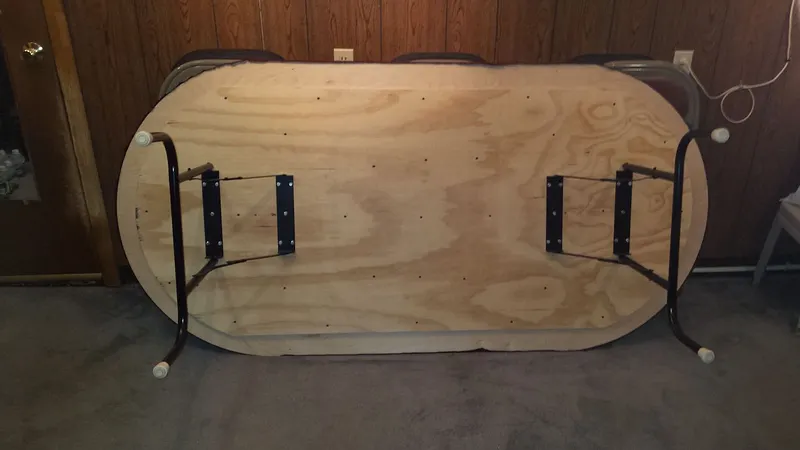
After cutting the rail sections, center it, and attach the smaller remaining oval piece of plywood to the bottom of the first piece of plywood (the table top) using carpenter's glue and one-inch drywall screws. Adding the remaining plywood to the bottom gives the table more stability and strength.
Center and attach the folding legs to the bottom of the table. After the legs are attached, stand the table upright.
Apply carpenter's glue to the top of the table and install the 1" foam. Take a break while the glue sets so the felt won't move.
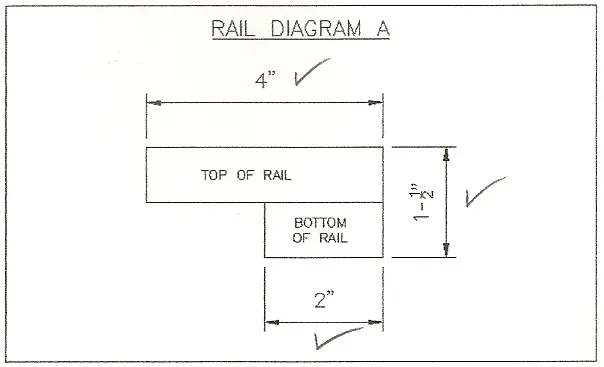
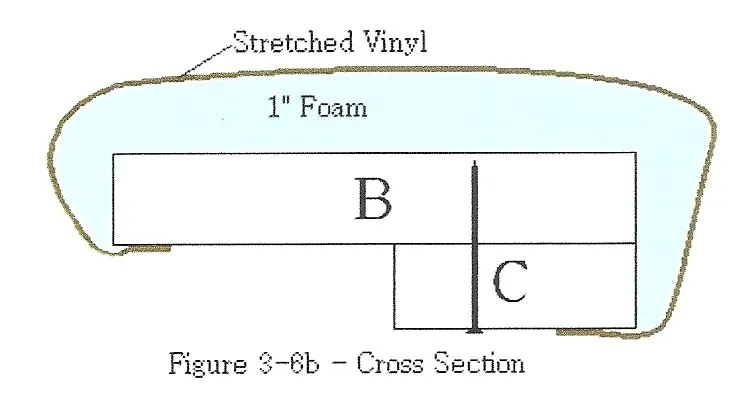
Center and attach the bottom of the rail to the top of the rail as in Rail Diagram A, again using carpenter's glue and one-inch drywall screws. Put to one side for upholstery later.
Check and make sure the table top felt is secure and doesn't move. Now it's time to install the speed felt.
Center the speed felt. With a staple gun in hand, start in the middle of the table along the edge of one side and apply 3-4 staples about 1" apart. Go to the other side, stretch the felt firm and straight and again apply 3-4 staples about 1" apart. Then go from side to side firming and straightening and applying staples.
NOTE: Do not staple on top of the table: staple on the edges only.
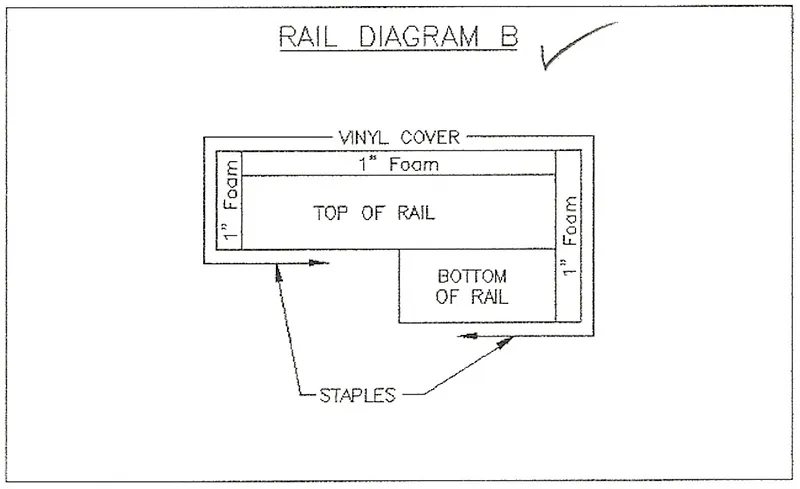
Step 3: Upholstering the Rail With Vinyl
That's it for the table. Next is the hard part; upholstering the padded rail with vinyl. To be honest, I couldn't do it. I ended up bringing the rail to a professional upholsterer who completed this task for $150. Even so, I'll describe how you upholster the rail.
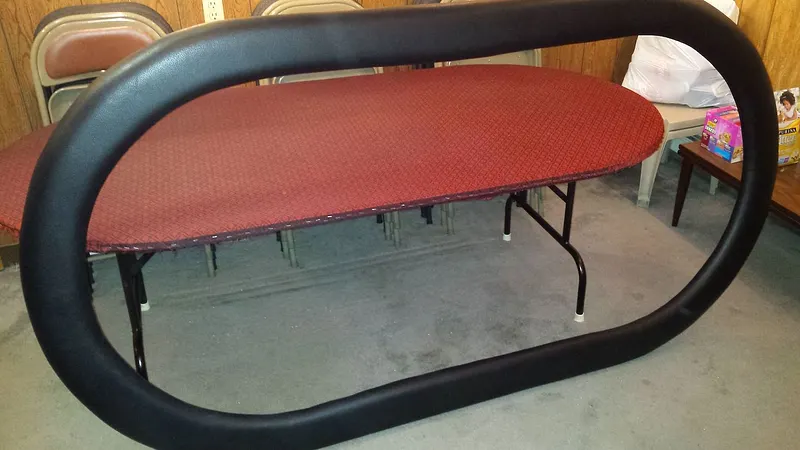
The first step to adding the vinyl is precisely the same as upholstering the poker table top. Just stretch the vinyl tight and get it stapled on all sides.
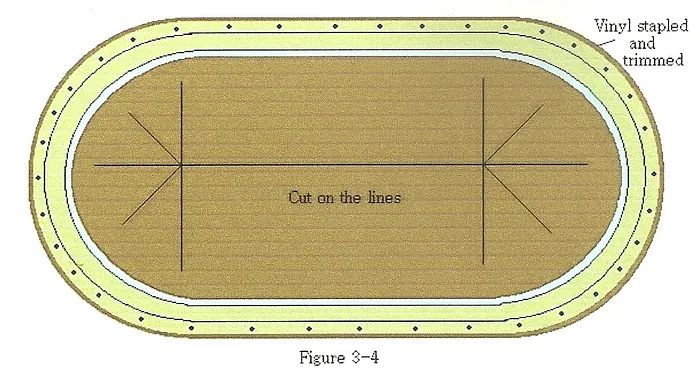
If this is your first poker table, you may want to hold off trimming the extra vinyl until the inside is also completed. Once the outside is done, you should have something that resembles a large drum.
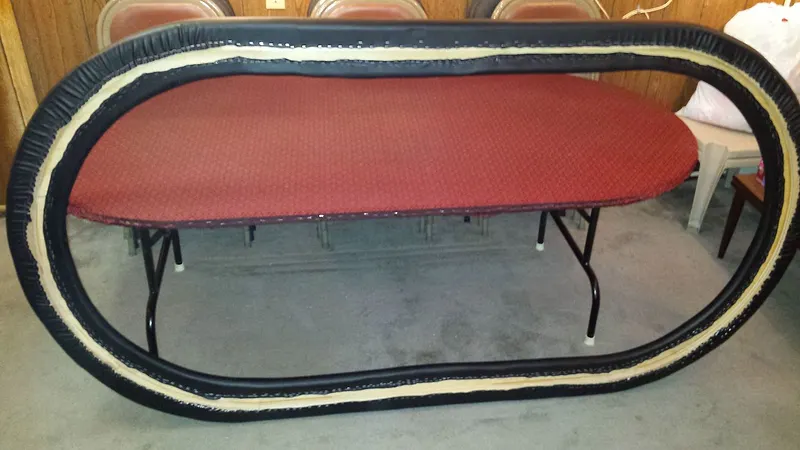
You then want to cut the vinyl down the middle and in a star pattern on each end (see the figure below).
Black stretchable poker table rail vinyl 55" x 108" (140 x 274 cm) Now that you have the vinyl cut, the sides are extremely easy to get out of the way. Make sure that you pull the vinyl as hard as you can when you're putting the staples in. If you finish this step and your forearms aren't sore, your poker table rail probably could have been better.
When you start on the ends of the table, you'll find that you'll probably have to continue to make these cuts to get the vinyl to wrap around the inner curve of the padded rail. Just make sure that you don't cut too close to the rail or you may end up with a tear in the vinyl that's showing on the finished poker table.
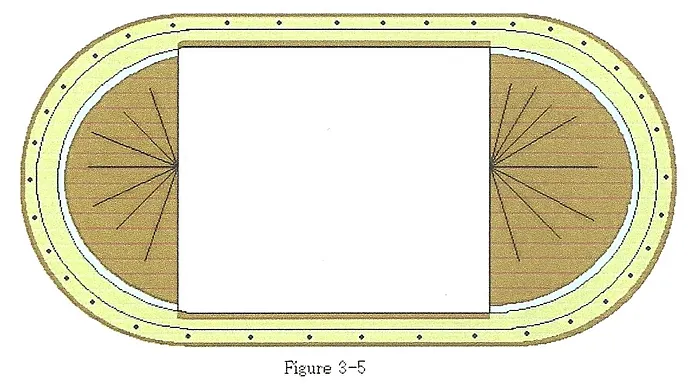
More cuts in the vinyl When you finish stapling the inside of the rail, you can pound all the staples in as you did before and cut off all of the extra vinyl.
Before you cut the extra vinyl, make sure that you don't have any large creases or wrinkles in the rail.
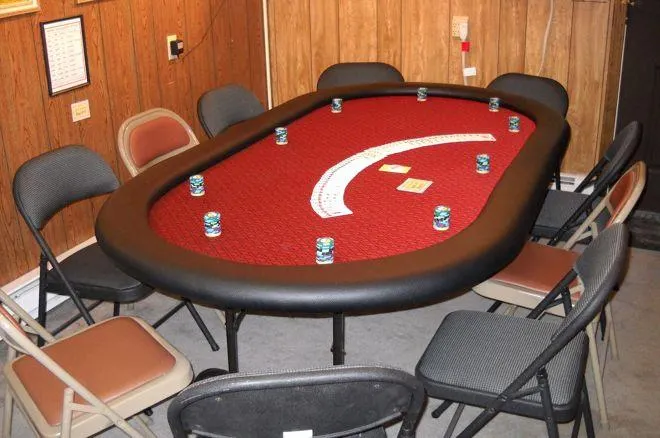
Now that you have the playing surface and the padded rail finished, it is time to put them together, and your own custom poker table is done.
What Does it Cost to Build Your Own Poker Table?
Breaking down the approximate cost of building your own poker table, here's what I ended up spending (including paying an upholsterer to help):
| Item | Cost |
|---|---|
| Two pieces 3/4" 4' x 8' CDX plywood | $80 |
| Carpenter's glue, three 8 oz. bottles ($5 each) | $15 |
| Folding legs | $40 |
| Speed felt | $50 |
| Piece of 1" foam | $25 |
| Vinyl | $25 |
| Miscellaneous parts | $25 |
| Having professional upholster padded rail with vinyl | $150 |
| TOTAL | $410 |
Conclusion
To sum up, if you want to take on the task of building your own poker table, you should be knowledgeable in carpentry and the use of tools. And, of course, you should have those tools. You should be knowledgeable in upholstery, and you should have an area in which to do all the work.
Depending on the style of table you want, it might well be easier and cheaper for you to buy a table online from a company like Gorilla Gaming.
Making a home poker table may seem like a fun project for someone or a small group of people who are at least moderately comfortable assembling simple furniture. However, it's a lot of work and may involve some tasks that even a reasonably handy person will not be able to easily complete.